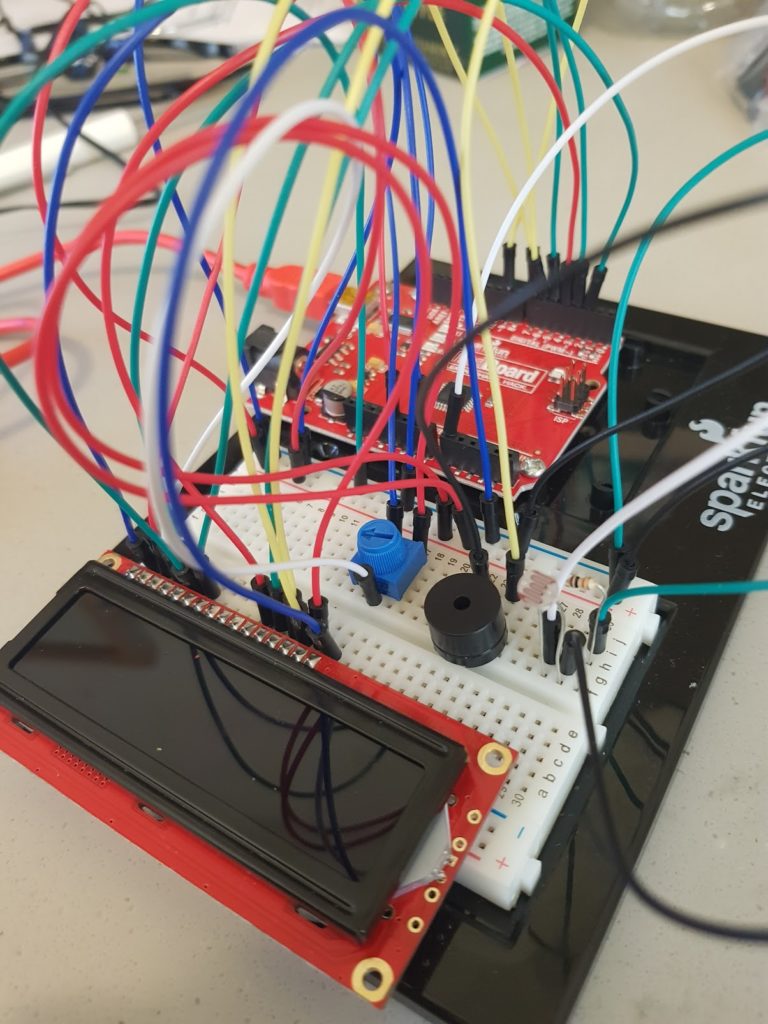
I started tapping on my desk to a beat, and felt like I wanted to make a “beat boxing machine”. But, I didn’t have a proximity sensor to detect movements and I didn’t want to use buttons as that seemed counterintuitive. What I did find in my kit though, was a photo resistor. I figured if I could connect it and detect when the light intensity is low(when you wave ur hand over the resistor) I could set up some arbitrary values and make the buzzer make some sounds.

It was relatively straightforward setting up the breadboard with all the components with the help of the tutorials. I learned that we need a potentiometer for an LCD to adjust the brightness so that it can be made visible in any light environment.
So I wanted to make use of the dusty LCD Display that we had in our kits, I searched for some tutorials on how to connect it, and did a simple hello world.
The next day, I started tapping on my desk to a beat, and felt like I wanted to make a “beat boxing machine”. But, I didn’t have a proximity sensor to detect movements and I didn’t want to use buttons as that seemed counterintuitive. What I did find in our kit though, was a photo resistor. I figured if I could connect it and detect when the light intensity is low(when you wave ur hand over the resistor) I could set up some arbitrary values and make the buzzer make some sounds.
It was relatively straightforward setting up the breadboard with all the components with the help of the tutorials. I learned that we need a potentiometer for an LCD to adjust the brightness so that it can be made visible in any light environment.
I found a function on the sparkfun website that converts frequencies into keys so I could actually play organ keys on the buzzer which was really cool. I also used code from the sparkfun examples to detect the light intensity from the photo resistor.
https://learn.sparkfun.com/tutorials/sik-experiment-guide-for-arduino—v32/experiment-11-using-a-piezo-buzzer
https://learn.sparkfun.com/tutorials/sik-experiment-guide-for-arduino—v32/experiment-6-reading-a-photoresistor
I initially started with a system where I had to manually check the maximum light intensity and then manually enter it as the, ‘startVal’ variable. Then every decrease by 5 units from the startVal frequency would result in a different note being played in the buzzer. Later I improved the function so it keeps detecting the light intensity and updating a, ‘high’ variable so I knew the max intensity without the need of manually entering it. So now it had auto calibration.
Here’s a video of how it worked displaying the note it’s currently playing on the LCD display (I used my phone to bring it closer and further from the photo resistor to vary the light intensity):
#include <LiquidCrystal.h>

const int jumpVal=5;


const int sensorPin = 0;
const int buzzerPin = 9;
const int rs = 12, en = 11, d4 = 5, d5 = 4, d6 = 3, d7 = 2;
int lightLevel, high = 0, low = 1023;

const int songLength = 1;
int starterVal;

char notes[] = "c";//dfda ag cdfdg gf ";

int beats[] = {1,1,1,1,1,1,4,4,2,1,1,1,1,1,1,4,4,2};

int tempo = 113;

LiquidCrystal lcd(2,3,4,5,6,7);

void setup() {

  lcd.begin(16, 2);
  pinMode(sensorPin, INPUT);
  pinMode(buzzerPin, OUTPUT);


}

void loop() {

   lightLevel = analogRead(sensorPin);
   manualTune();
   starterVal=map(high, 0, 1023, 0, 255);
   lcd.setCursor(0, 0);
   lcd.print(lightLevel);
   lcd.setCursor(0, 1);

    int i,j, duration, prox;
    char noteNames[] = { 'c', 'd', 'e', 'f', 'g', 'a', 'b', 'C' };
    if(lightLevel<(starterVal-(jumpVal))) {
  for (j = 0; j < 8; j++)
  {
    int num=starterVal-(jumpVal*j);
    if (lightLevel<num) {
      notes[0]=noteNames[j-1];
      lcd.clear();
      lcd.setCursor(0, 0);
   lcd.print(lightLevel);
   lcd.setCursor(0, 1);
      lcd.print(noteNames[j-1]);

      }
    }
  for (i = 0; i < songLength; i++)
  {
    duration = beats[i] * tempo;

    if (notes[i] == ' ')
    {
      delay(duration);
    }
    else
    {
      tone(buzzerPin, frequency(notes[i]), duration);
      delay(duration);
    }
    delay(tempo/5);
  }
} else {
        lcd.clear();
      lcd.setCursor(0, 0);
   lcd.print(lightLevel);
   delay(100);
        }

}

void manualTune()
{
 if (lightLevel < low)
  {
    low = lightLevel;
  }


  if (lightLevel > high)
  {
    high = lightLevel;
  }
  lightLevel = map(lightLevel, 0, 1023, 0, 255);
  lightLevel = constrain(lightLevel, 0, 255);

}

int frequency(char note)
{

  int i;
  const int numNotes = 8;
  char names[] = { 'c', 'd', 'e', 'f', 'g', 'a', 'b', 'C' };
  int frequencies[] = {262, 294, 330, 349, 392, 440, 494, 523};


  for (i = 0; i < numNotes; i++)
  {
    if (names[i] == note)
    {
      return(frequencies[i]);
    }
  }
  return(0);

}