This is my Intro to Interactive Media - Final Class Project documentation.
Background
My final project was a, “DJ Mixer” where the user could use his/her own hands to control and mix two songs together to play at the same time. For example, Ed Sheerans’s shape of you background music could be played with Justin Bieber singing love yourself.
Timeline
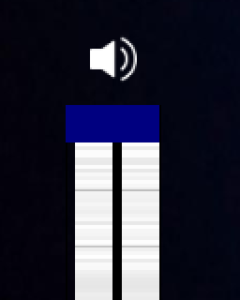
1) Used the Minim Processing library to simply play 2 songs at the same time, one kareoke and one acapella, and was working on a volume controller which looked like this initially and worked with the cursor on the computer:
2) Integrated it to the kinect using a library by Dan Shiffman and added pause buttons.
3) Added many more songs, removed pause buttons, instead the currently playing song could be hovered on to pause.
4) I then made many improvements to the previous version: * I improved the design a bit. * Cropped the mp3 files of the songs to go directly to the music rather than a pause or an intro as many of the youtube videos had them. * Made the webcam visible in a small area at the bottom. * I also made the volume be always visible to the user as it wasn’t clear to them that that functionality was possible.
5) The final update was mainly a huge UI and Design bump which I will go over in the next section. I also added a, “DJ Training” stage in order to train users on how to move the hand around the screen to select stuff. (In the video below I use the computer cursor as the pointer for demo purposes)
Technical Aspect
The base of my project was not hard to make. I am glad I went with the object oriented approach as I’m sure it saved me TONS of time as I started making many upgrades to it. I created a Song class that included the functionality of instantiating the song with its song file, displaying the song on the screen, having on hover functionality for that song, playing and pausing functions. I then made an array of Song objects in a songs array and instantiated them all. This made it trivial to add new songs. Using an object oriented approach allowed me to implement the volume controller class and add in many design improvements such as font and on hover shading easily. The controlling of the cursor was perhaps the most important part technically as it is what gives the user the ability to interact with my project so it had to be as seamless as possible which is why I focused on it a lot. The kinect integration was simple as I got the code from Dan Shiffmans website. However, the detection of the hand was VERY buggy initially and I had to make many changes to optimize it specifically for my requirement:
- The first important thing I did was make the cursor return to a specific spot if there is no depth greater than the threshold value. This reduced some unintentional clicking.
- The second is that I optimized Dan Shiffman’s Kinect class to suit my needs by adding 2 counters: one totalArea counter which increments in the for loop and one handArea counter which also increments in the for loop but only when the depth is greater than the threshold value. I then only allowed the movement of the cursor if handArea/totalArea=0.065 as after some testing found that the hand is less than 6.5% of the total kinect screen.
-
I made everything hover based, any song, pause button and volume control has its own counter which I use to make it function only when the cursor hovers over that part for some time. This dramatically reduced unintentional clicks.
Design and Interactivity
As you have seem there was a bump in the design from the 90% ready project and the 100% ready project. Let me take you through some of my decisions.
- The adding of icons was important as professor suggested, as it gave the users a clear idea of what would happen when clicked which is why I used icons for pause, and a sound icon near the volume controllers. This worked well in practice as I didn’t have to explain much to the users, they simply knew what to do.

|

|
I added a hover shade effect when a user hovers over a song name and a color change to the pause buttons when hovered. I did this so that first time users would know that the song is indeed clickable (or pause button). It almost gives the, ‘hyperlink’ feel to the user which is familiar to them and hence serves my project better in terms of interaction.
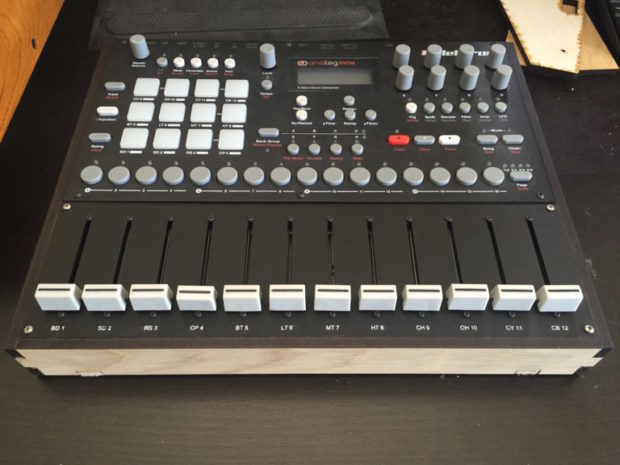
- I worked hard on the volume controller, which is why it has its own class. I wanted to design it just like a volume controller in a dj rack where the user could move a knob along a slider in order to control the volume. I did this so the user could relate what they see to a volume knob in a sound mixer in order to know what the volume controller does. The background of the volume controller initially were horizontal, equally spaced lines but I decided to make it random constantly moving lines to give it a live feel so that the user knows that something can be done by using it

|

|
- I needed a good font as the one I selected initially wasn’t appealing to many users. I wanted a font that would be:
- Easy to read
- Had some type of old-school tech feel to it (like how text is displayed on a small LED display)
- Seemed intriguing to catch some passer-by’s attention After some considerable research, I found a font called “underwood”, which seemed like a good choice as it fit my criteria.
- The background image of a DJ rack that I found on google images was a nice addition as it fit my project well. The two racks seemed cohesive with the two sides (kareoke and acapella) that the user could choose songs from. Many users actually started hovering over the DJ racks themselves thinking it would do something.